
DC5 Silicone Taillight Gaskets Guideline
Replacing taillight gaskets first involves removing the rear bumper. Please reference the illustration.
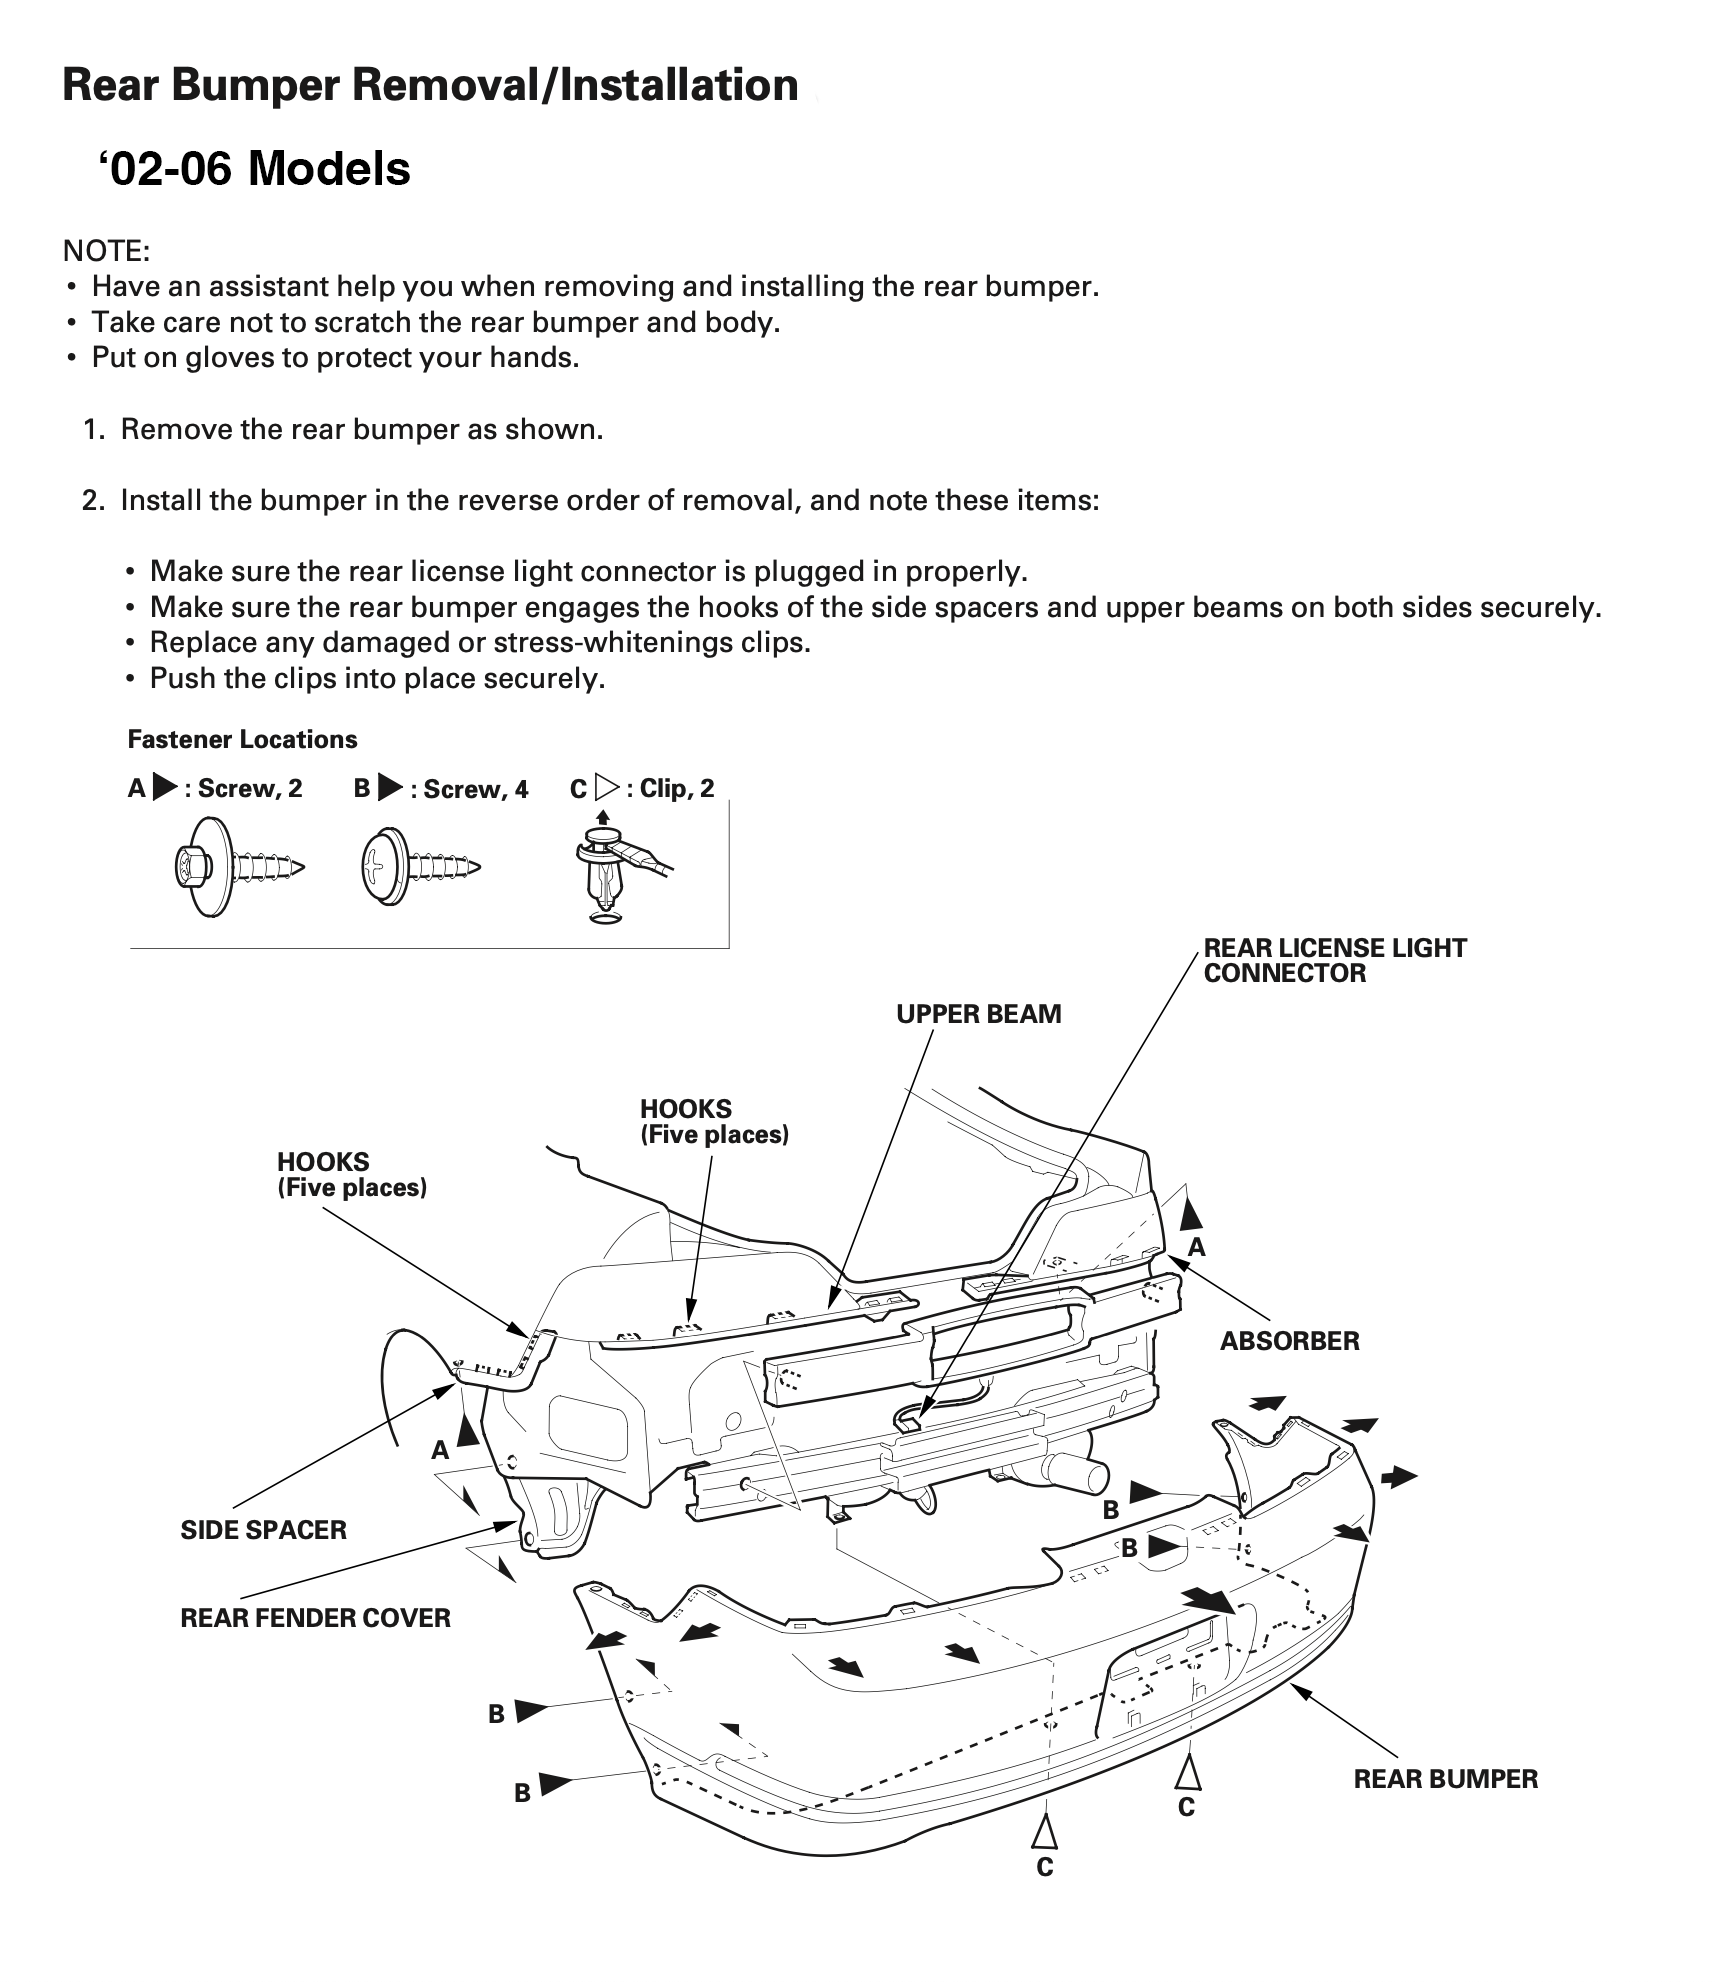
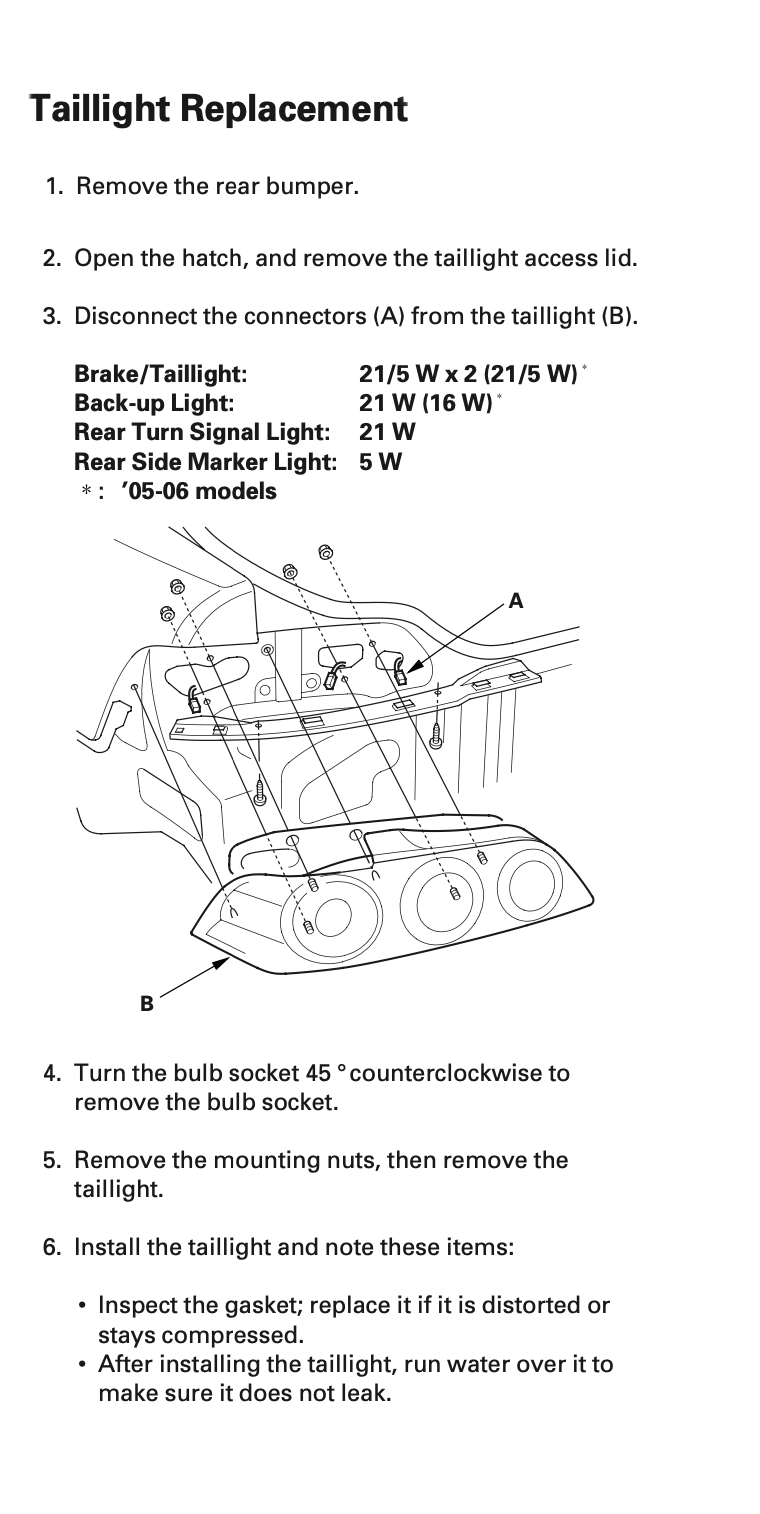
After the rear bumper is removed, the rear taillights can now be accessed.
7. When installing our original silicone taillight gaskets, please make sure the contact surfaces on the body and taillight are completely clean. We typically use spray wax and a thorough wipe before install. 05-06 Models, make sure to remove all the adhesive from the previous gaskets.
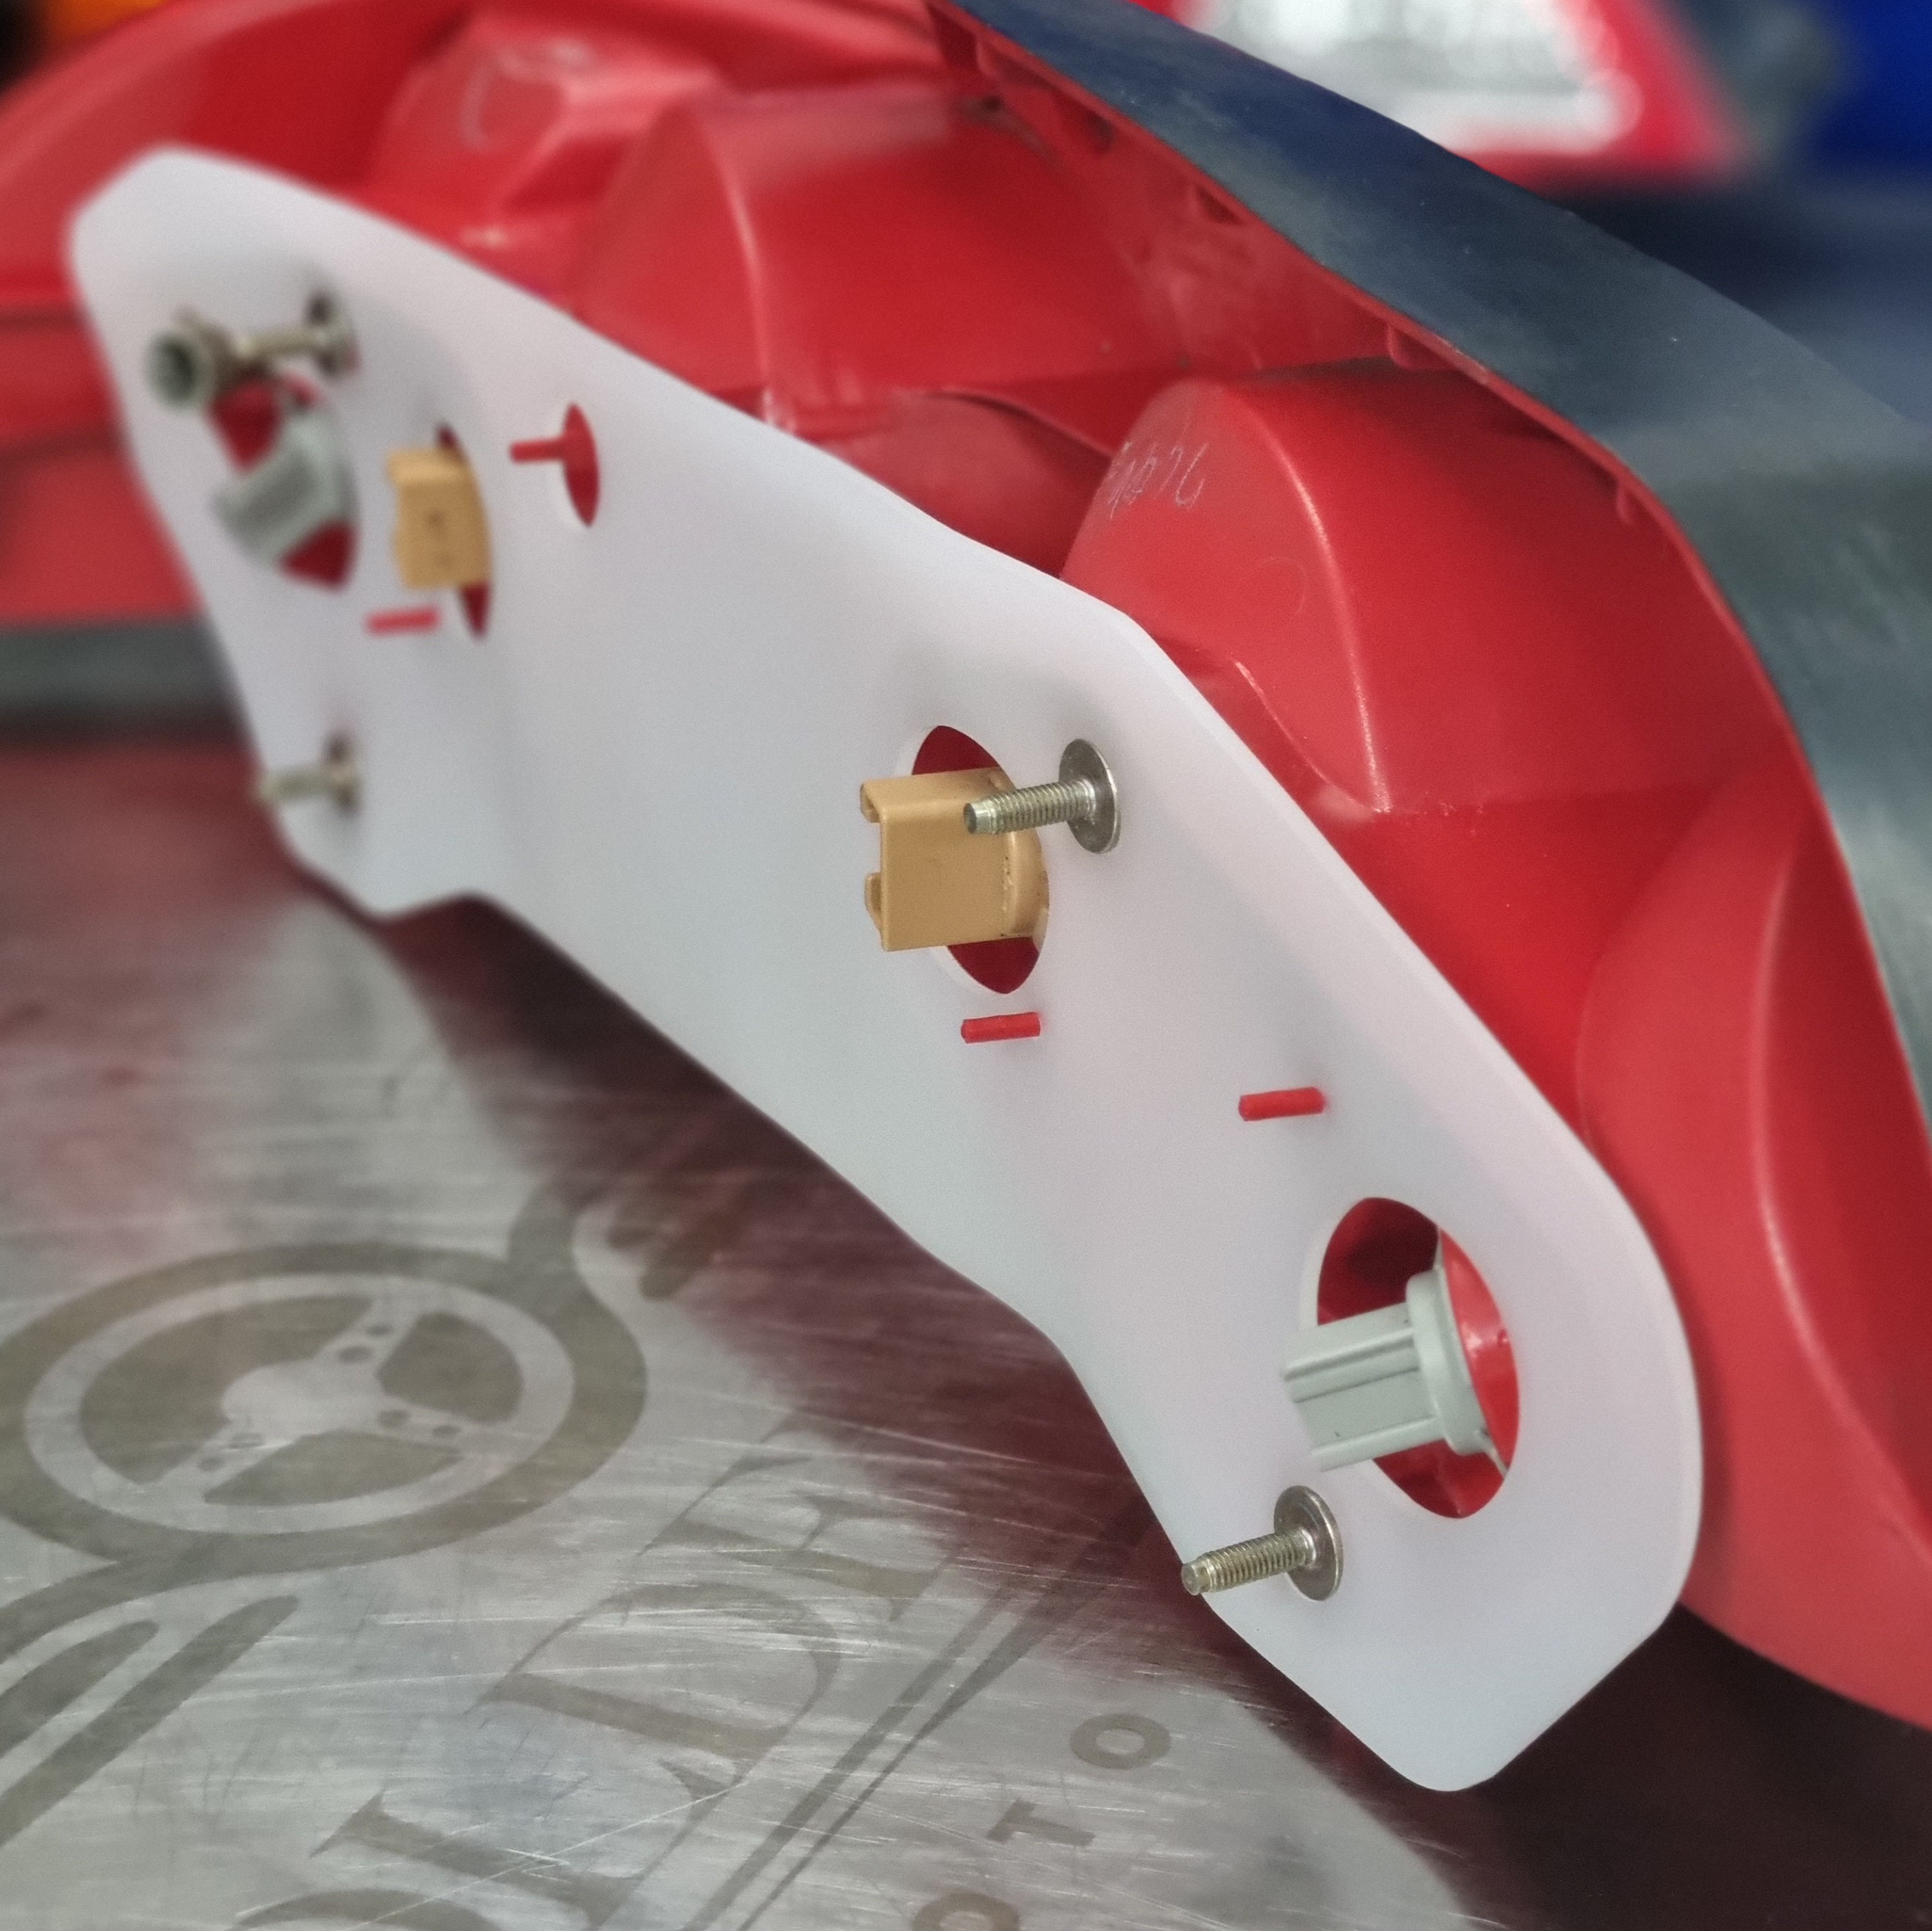
8. Mount the gaskets on the taillights making sure all the bolt holes and plastic pins are line up and mounted on the gasket.
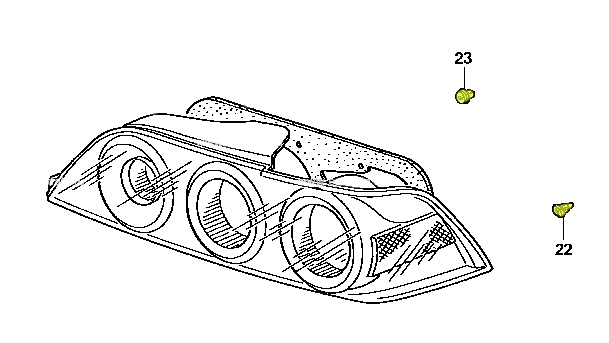
Note: All DC5’s, 02-06 use the highlighted plugs in the illustration below. Make sure you are not missing them. From out experience, missing plugs will cause leaks!
9. Reassemble by reverse installation procedure.
10. Enjoy a leak free chassis!